
Build a custom velcro patch hat: complete 2026 workflow
Instead of wrestling a patch onto a curved hat every time it peels, build around a measured loop panel and a compatible hook-backed patch. This custom velcro patch hat build walks you through checking fit, mounting the patch, and setting up swaps without turning your range hat into a glue-covered arts-and-crafts casualty.
- A custom velcro patch hat build starts with panel measurements, compatible backing, and a curved-crown fit check.
- Stickthison morale patches suit gun owners who want range-culture humor; verify each design’s dimensions and backing before mounting.
- Choose a factory loop-panel hat for the simplest setup; add sew-on loop only when the hat needs it.
- Test patch edges while wearing the hat. Flat-table fit does not prove curved-crown fit.
Why this matters
A patch can fit the panel on paper and still stick out like a tiny billboard once you wear the hat. The crown curves, the panel bends, and a stiff patch does not automatically volunteer to follow along.
Stickthison morale patches are best for gun owners who want range-culture humor on a hat they already own. Browse Stickthison for designs, but treat the joke and the mounting system as separate decisions. Funny does not fix incompatible backing.
This 2026 workflow covers personalizing a hat with a removable patch, not ordering a newly manufactured hat or commissioning artwork. Your finished setup needs secure engagement, comfortable wear, and an easy way to change the message when the range-group chat supplies fresh material.
Before you start
- Gather the hat and patch information. You need the actual hat, a ruler or flexible tape, paper, scissors, and the patch’s stated dimensions and backing. A product photo is not a measurement.
- Check the attachment surfaces. The usual removable setup pairs scratchy hook on the patch with soft loop on the hat. If your hat has no loop panel, gather sew-on loop material and suitable sewing supplies, or arrange the work with someone who can sew hats.
- Catch the backing trap now. Some patches arrive attached to a separate loop backing piece. Remove that protective piece to expose the hook before testing against the hat’s loop panel. Loop pressed against loop accomplishes approximately nothing.
Do the initial fitting away from firearms and ammunition. This is a hat project; your workbench does not need an audience of unrelated gear.
Hat and panel configuration
Choose the mounting route
For your 2026 build, choose the hat attachment method before choosing the loudest patch. Both routes below create a removable patch setup, but only one starts ready for mounting.
| Mounting route | Best for | Advantage | Limitation |
|---|---|---|---|
| Factory loop-panel hat | A straightforward first build | The attachment panel is already installed | Your patch must suit the existing panel’s size and curve |
| Sew-on loop added to a hat | Keeping a hat you already like | You choose the panel position and outline | Sewing adds work, and interior stitching needs a comfort check |
Choose a factory loop-panel hat if you want to avoid modifying the crown. Choose added loop when keeping your existing hat matters more than avoiding sewing. Neither route makes an oversized patch behave.
- Inspect the front panel. Identify the usable loop area, not just the surrounding decorative border. Check for loose stitching, damaged fabric, or a seam that creates a ridge.
- Set the hat adjustment. Wear the hat as you normally would. Tightening it later changes the crown shape and can change how the patch sits.
- Measure width and height. Measure the usable attachment area and note where the crown starts curving sharply. Keep the measurements separate; a wide panel is not necessarily a tall panel.
- Choose a location. Keep the patch clear of the brim junction and anything that prevents its backing from contacting the loop.
Expected result: You have a defined mounting area and know whether the hat is ready for a patch or needs a loop panel first.
Add loop only if needed
If the hat already has a sound loop panel, skip this installation step. More layers are not a personality trait.
- Cut a paper panel template. Position it on the worn hat before cutting loop material. Check that it follows the crown without wrinkling.
- Check inside access. Locate the sweatband and lining. Do not accidentally stitch through an interior component that needs to remain free.
- Fit sew-on loop material. Use material intended for sewing, and follow its instructions. Secure the panel without stretching the hat fabric into puckers.
- Inspect the inside. Finish thread ends and check for scratchy spots against your forehead. If the crown construction makes access difficult, stop and hand the job to someone equipped for it.
Expected result: The loop panel stays attached independently when you remove a patch, and the hat remains comfortable.
Patch fit configuration
Make a paper fit check
Your 2026 fit check happens on your head, not just on a countertop. A flat hat front can flatter a bad decision almost as effectively as your range buddy.
- Copy the patch outline onto paper. Use the stated width and height. For an irregular design, use the actual outline when you have it; a bounding rectangle checks space but not every protruding detail.
- Hold the template against the worn hat. Check it from the front and each side. Keep it clear of the brim and outside the area where the crown folds sharply.
- Look for unsupported edges. Any section hanging beyond the loop panel lacks attachment beneath it. Reposition the template or choose a different shape.
- Repeat with the actual patch. Paper checks the footprint, not stiffness. Do not treat a successful paper test as proof that thick PVC follows the same curve.
Expected result: The patch footprint stays within the usable panel, and the actual patch sits against the worn crown without obvious edge lift.
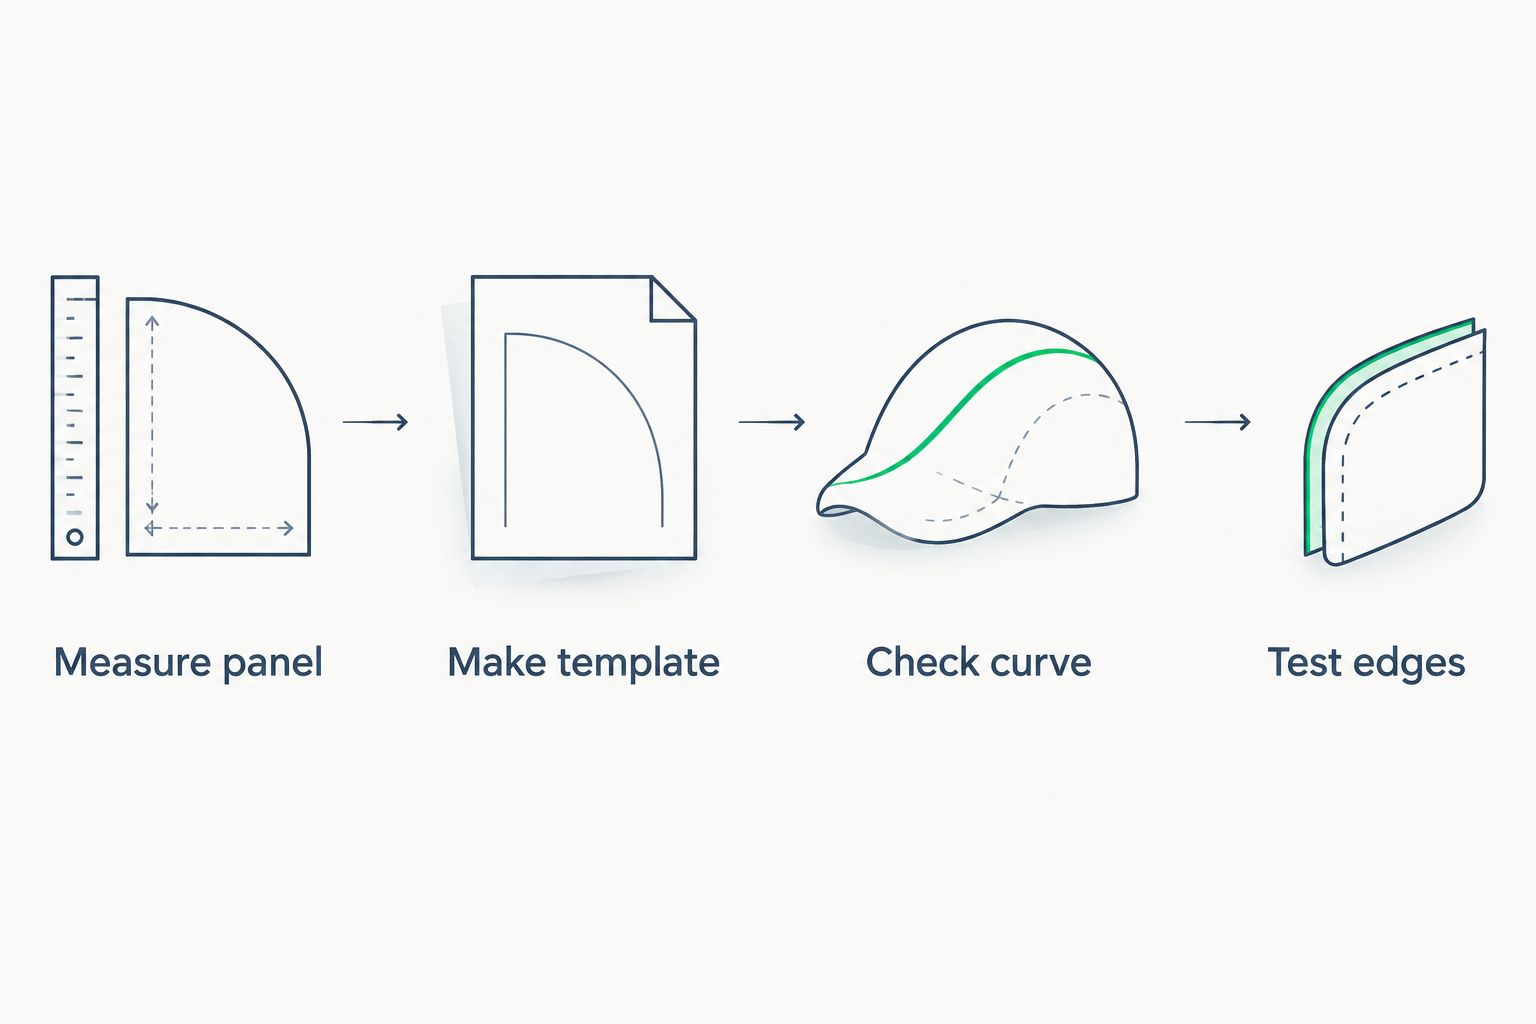
Compare documented patch details
These Stickthison options provide useful examples of what to check. Match the dimensions to your hat before choosing the punch line. None is a universal fit, and the stated specifications do not establish how each patch behaves on your particular crown.
| Patch | Best for | Documented details | Advantage | Limitation |
|---|---|---|---|---|
| American Flag Multicam Morale Patch (PVC) | A flag design with a fully stated footprint | Thick, 3D PVC; 3 inches wide by 2 inches high; hook/loop backing | Both dimensions are supplied for the template | The PVC construction still needs a curved-crown check |
| American Flag: Original Design Morale Patch | An embroidered flag option | Embroidered; 3 inches wide by 2 inches high; hook/loop backing | The same stated footprint makes comparison straightforward | Matching dimensions do not prove matching flexibility |
| Hell Is Gonna Be Lit Morale Patch | A joke-forward setup with room for a wider design | Thick, 3D PVC; 3.75 inches wide; hook/loop backing | The stated width lets you reject an undersized panel early | Confirm the height before making a complete template |
The flag options share stated dimensions, not a guarantee of identical fit. The wider joke patch needs its own check; cramming it onto a smaller panel is not customization, it is denial with hook backing.


Attachment and wear check
Mount the patch
- Clear the attachment surfaces. Pick visible lint from the hook and loop without cutting or tearing either surface. Follow the hat and patch care instructions for anything beyond loose debris.
- Expose the hook backing. Set aside any separate loop backing piece. Keep it for covering the hooks during storage.
- Align before pressing. Support the crown from inside and position the patch within the panel. Check the orientation before engaging the whole backing.
- Press across the patch. Work across the center and toward the edges while supporting the fabric behind it. Do not crease a patch to force it around the crown.
- Put the hat on. Look at the edges while the crown is under normal wearing tension. Turn your head and bend forward over a clear surface, then inspect the patch again.
Expected result: The patch stays positioned through ordinary head movement, its edges remain engaged, and the mounting area does not create forehead pressure.
This is a fit check, not a retention certification. If the patch lifts during normal movement, correct the fit before wearing it out; pressing harder is not a permanent repair for incompatible shapes.
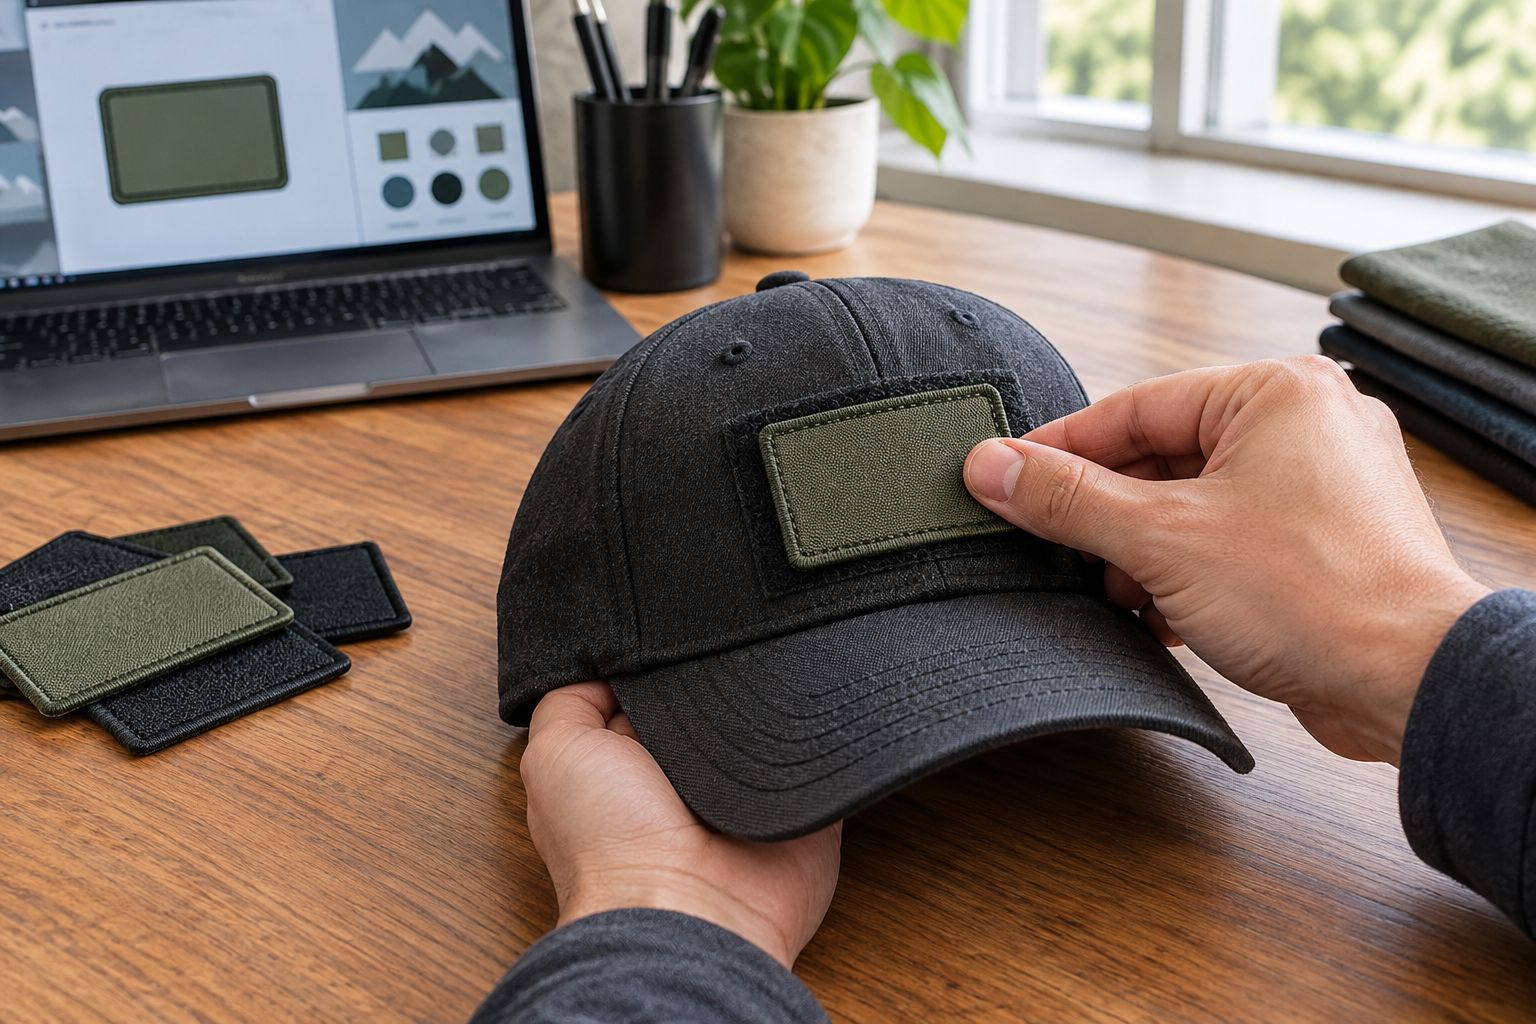
Swap the patch whenever the message changes
A removable panel lets your 2026 hat alternate between a flag and a joke without rebuilding the mounting system. Validate each patch separately, even when the first one fits perfectly.
- Support the hat beside the patch and peel the patch back gradually. Avoid yanking the crown away from its panel.
- Cover the removed patch’s hooks with its separate loop backing, if supplied, or compatible loop material.
- Inspect the hat panel for lint, loose stitching, or distortion before mounting the replacement.
- Repeat the alignment and worn-hat edge check with the new patch.
Expected result: You change the patch without pulling the hat panel loose, and each replacement passes the same fit check.
For a hat-to-range-bag setup, use the one-patch, multiple-gear swap system. Check each receiving panel independently; a flat bag panel and a curved hat crown are different mounting surfaces.
Troubleshooting
The patch does not grip at all
Check which surfaces are touching. Remove any separate loop backing covering the patch’s hooks, and confirm the hat panel is loop rather than ordinary fabric. Hook backing does not make every fabric a compatible receiver.
The center sticks but the corners lift
Check the patch footprint and crown curve while wearing the hat. Reposition it within the usable panel; if the corners still cannot make contact, choose a narrower or more conforming patch rather than adding glue to the corners.
The whole loop panel pulls away
Inspect the panel attachment, not just the patch backing. Repair failed stitching or have the panel reinstalled before continuing. Strong hook engagement is useless when the receiving panel leaves the hat with it.
The hat feels scratchy or tight
Remove the patch and inspect the inside for exposed stitching, thread ends, or installation damage. Reset the hat adjustment and repeat the comfort check. Do not hide a painful sewing job beneath another layer and call it fixed.
The backing collects lint
Remove loose debris carefully and protect the hooks during storage. Follow the product’s care directions before using cleaners or aggressive tools. A patch full of sweater fuzz needs cleaning, not a motivational speech.
Customize your workflow
Keep a simple fit note for your 2026 setup: hat, usable panel dimensions, patch outline, backing, and whether the edges stay engaged while worn. Update it when you change hats or patches rather than trusting memory.
Stickthison designs handle the message; your measurements handle compatibility. If you move from choosing an existing patch to planning original artwork, separate design decisions from mounting decisions. Tiny lettering, irregular outlines, and tall designs still have to fit the actual hat.
For a personal hat rotation, prioritize designs that fit the same receiving panel. That keeps swapping simple without pretending every patch in your collection belongs on your forehead.
FAQ
What do I need for a custom velcro patch hat build?
You need a hat with a secure loop panel, a compatible hook-backed patch, and measurements of both. If the hat has no panel, add suitable sew-on loop before mounting the patch.
Can I put a hook-backed patch on any baseball cap?
A hook-backed patch needs a compatible receiving surface, usually loop material. Ordinary cap fabric is not a substitute for a proper loop panel.
What size patch fits a hat?
A patch fits when its footprint stays within the usable panel and its backing engages the curved crown. Measure your hat rather than assuming a 3-by-2-inch patch fits every cap.
Why does my patch stick in the middle but lift at the edges?
Edge lift indicates that the patch is not making full contact at the edges. Check for overhang, crown curvature, debris, and a patch that is too stiff to follow the mounting surface.
Is PVC better than embroidery for a patch hat?
Neither material automatically fits a hat better. Compare each patch’s dimensions, backing, stiffness, and actual contact on the worn crown rather than choosing by material alone.
Can I attach a patch without sewing?
You can mount a hook-backed patch without sewing when the hat already has a secure compatible loop panel. A hat without that panel needs a separate attachment solution suited to its fabric and construction.
Does this build require a custom-made patch?
No, this build personalizes a hat with an existing compatible patch. Creating original artwork or commissioning a newly manufactured patch is a separate project.
One last thing
The hat changes shape when you put it on. That is why the final test belongs on your head, not beside your keys on the kitchen counter.
Before the next range trip, check the edges with the hat adjusted normally. If the patch only sits flat when the hat is empty, the build is not finished—no matter how excellent the joke is.


Comments